Step-by-step guide

How to set up the DATIXO add-on for Shoptet

You can connect your store in just a few minutes. Have access to your store administration ready and follow the screenshots below.

Good to know: Installing the add-on is free. Your chosen subscription applies to the use of DATIXO itself.
11 simple steps

From installation to your first dashboard

Once installed, your store connects to DATIXO and data starts loading automatically.

1

Order the add-on

Open DATIXO in Shoptet Add-ons, sign in and click Order add-on.
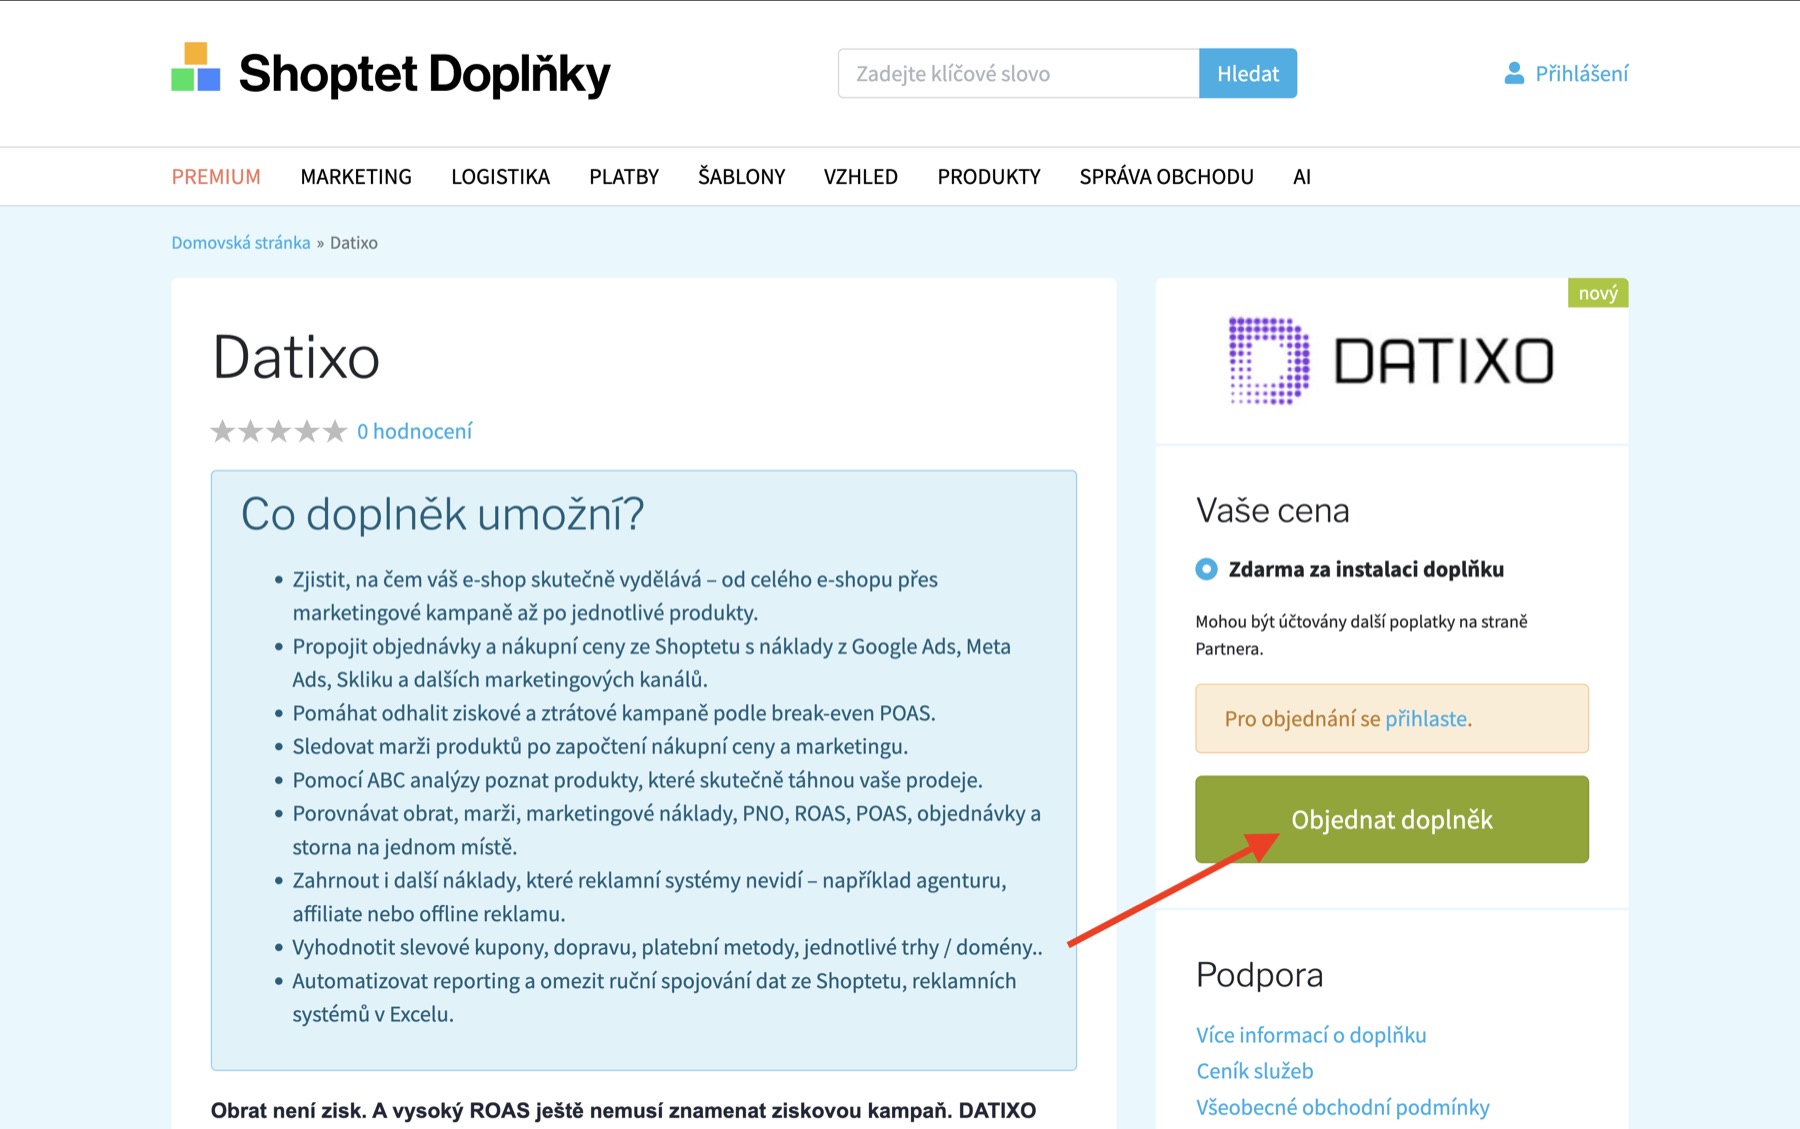
Objednání doplňku DATIXO v Shoptet Doplňcích
On the add-on detail page, select “Order add-on”.
2

Select your online store

Enter the address of the store where you want to install the add-on, then continue by signing in.
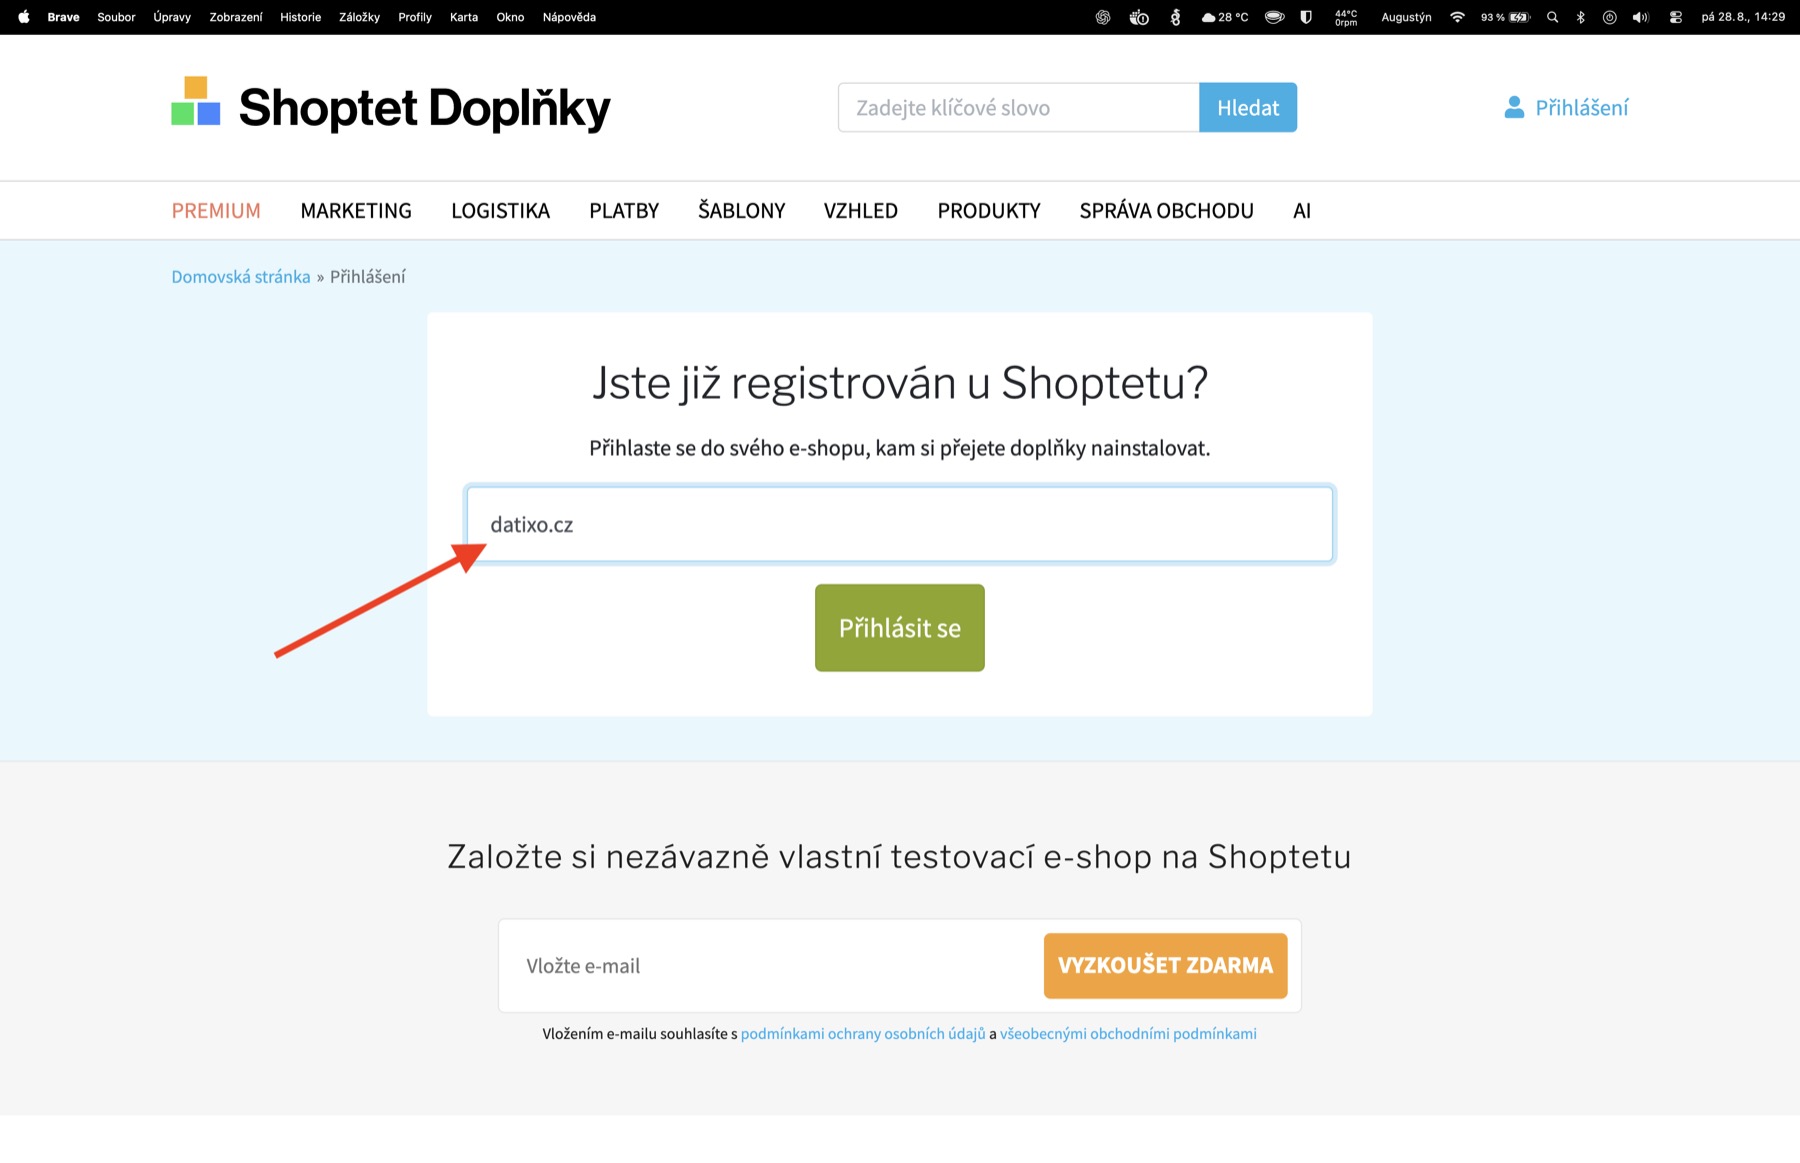
Výběr e-shopu pro instalaci doplňku
Enter only the store address, for example my-store.com.
3

Confirm the installation

After signing in, make sure you are in the correct store and click Order and install.
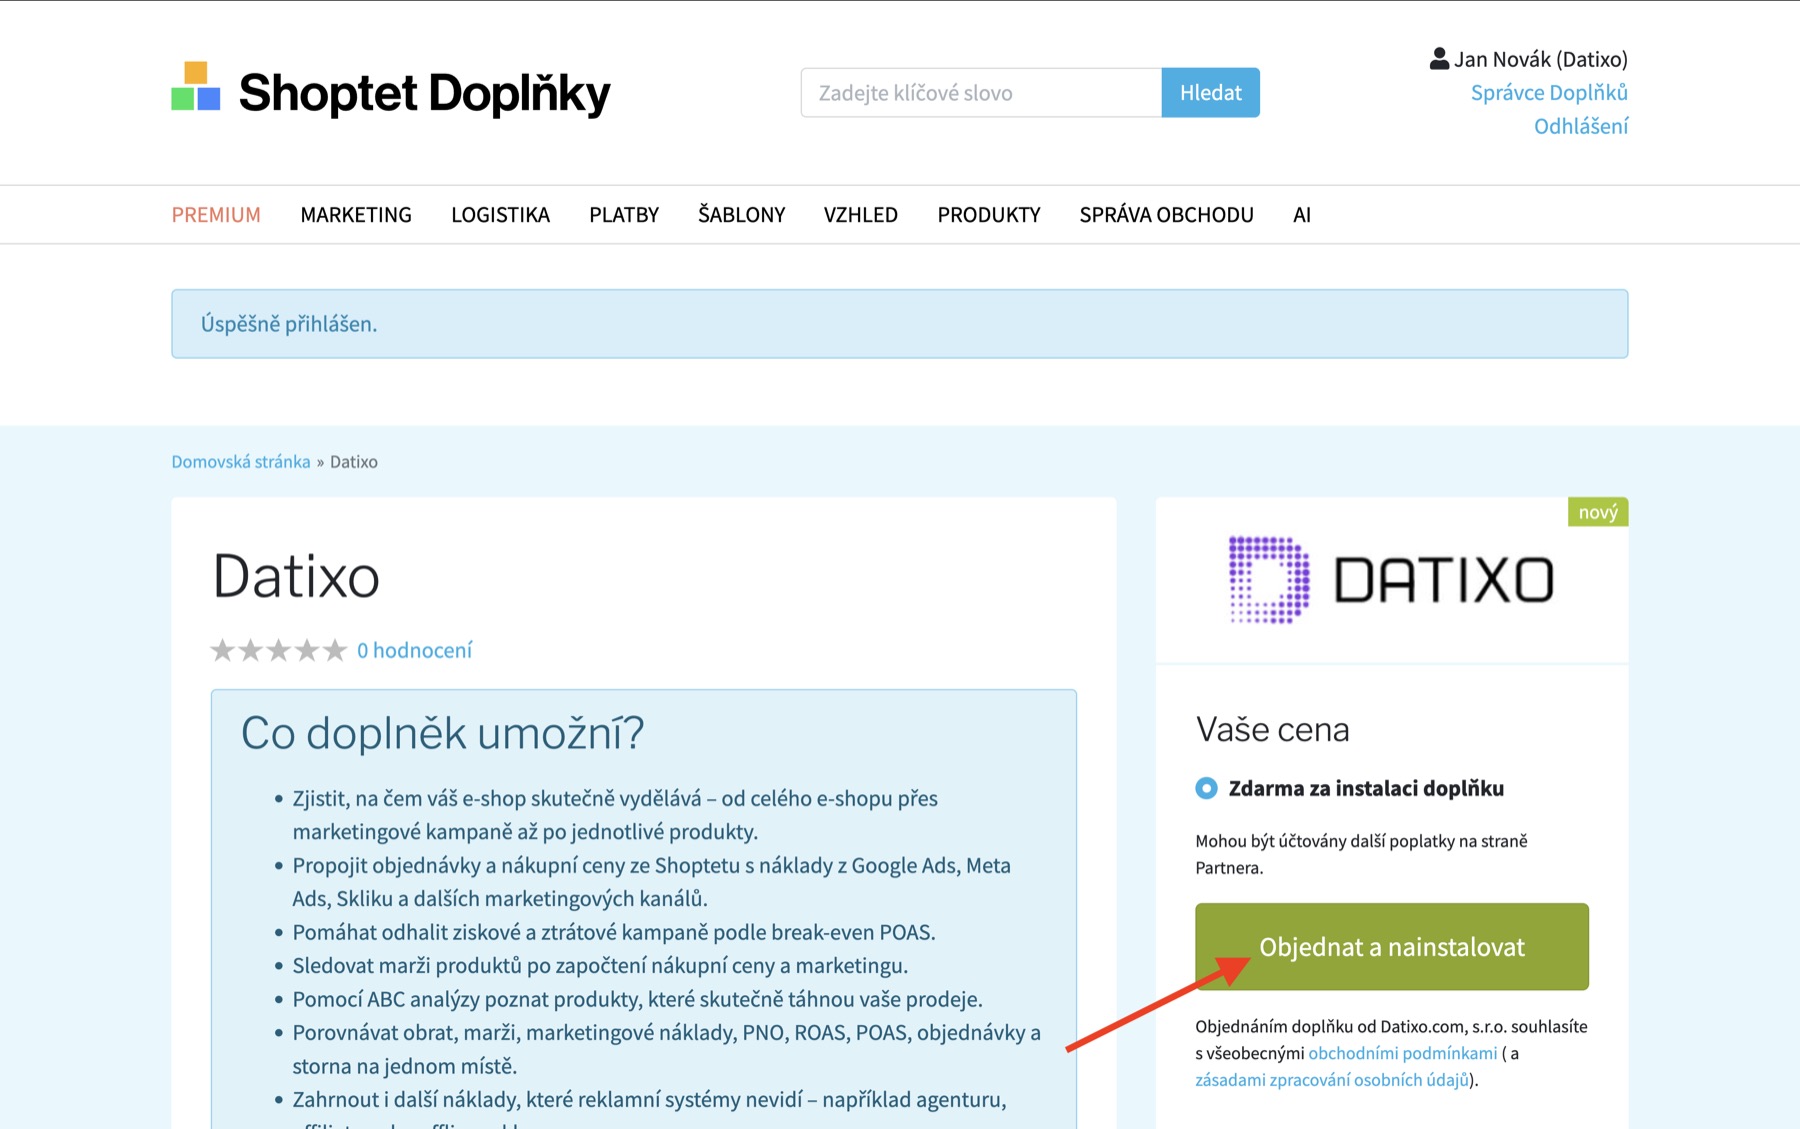
Potvrzení instalace doplňku DATIXO v Shoptetu
Confirm with the “Order and install” button.
4

Open the settings

After installation, return to the add-on detail and click Open add-on settings.
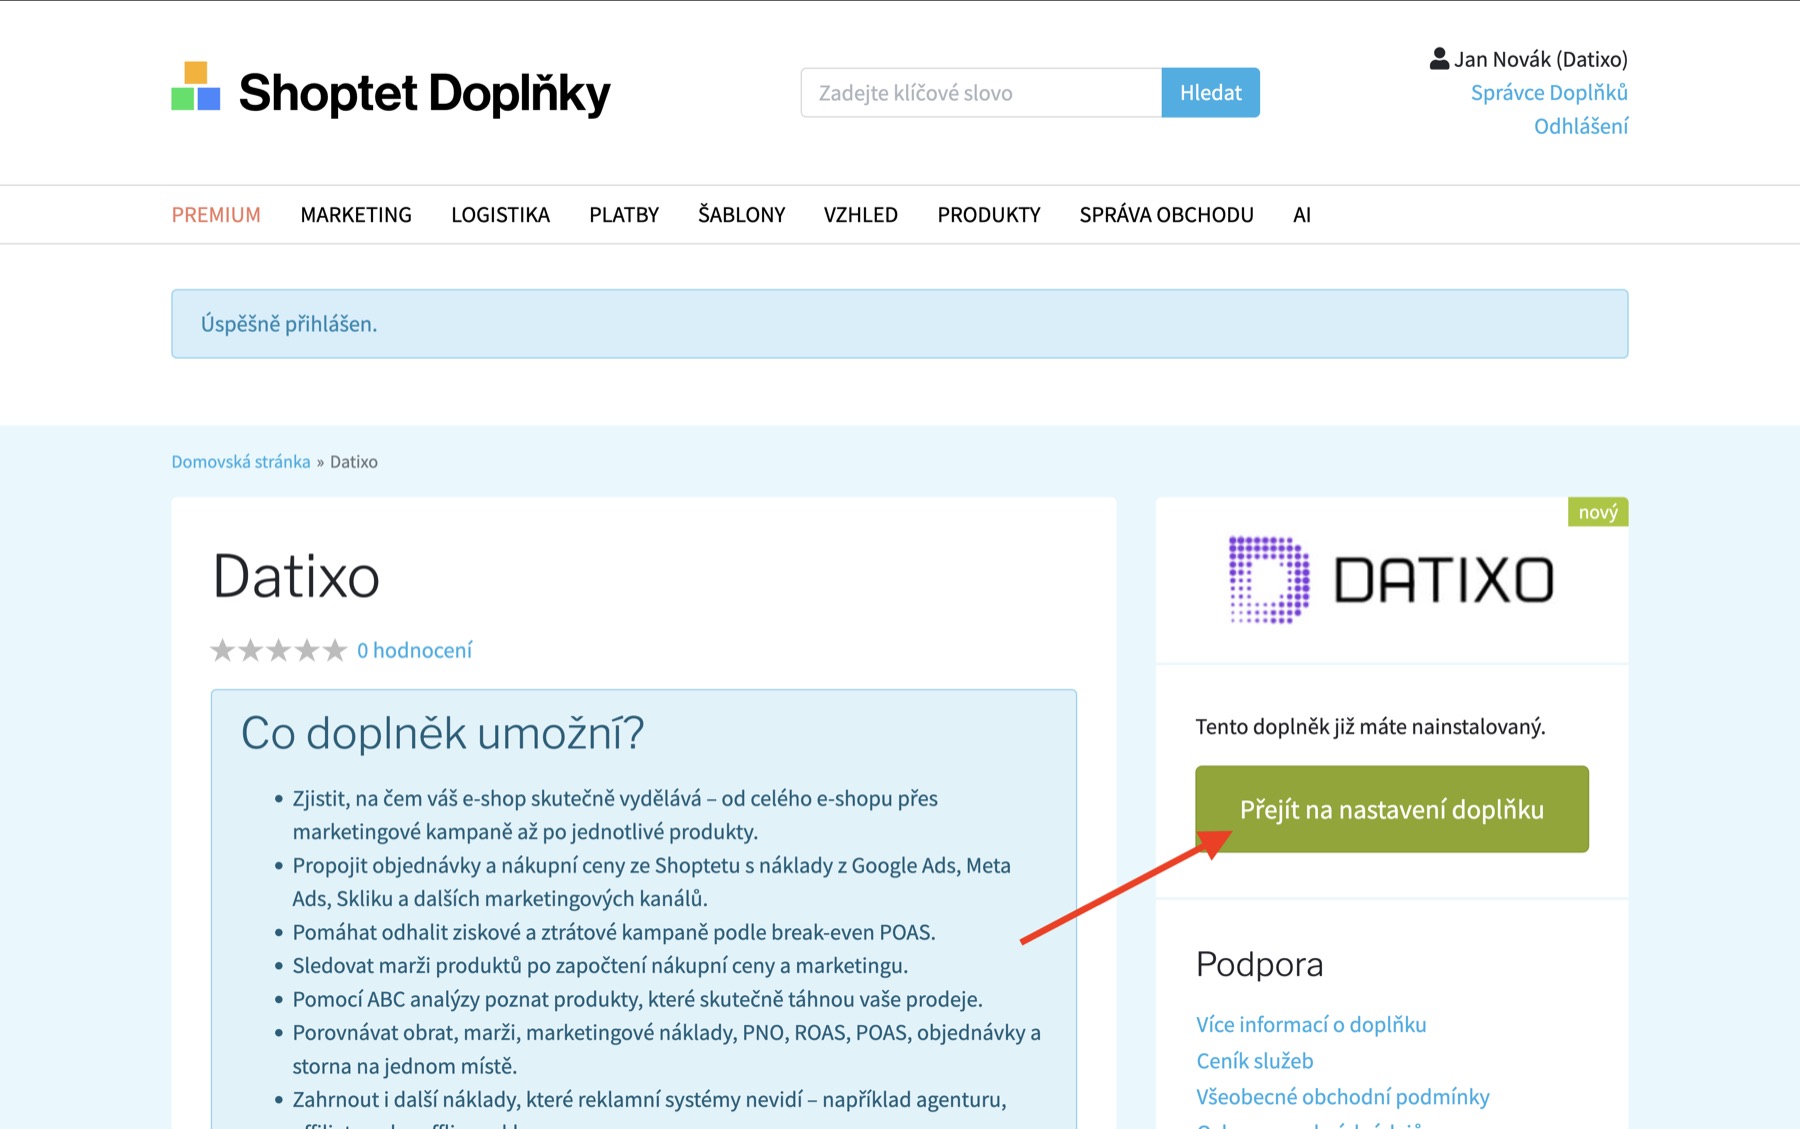
Přechod z Shoptetu do nastavení doplňku DATIXO
Shoptet will securely redirect you to DATIXO.
5

Sign in with your email

Enter your email and click Continue. If you already have a DATIXO account, enter your password next. Otherwise, the registration form will appear.
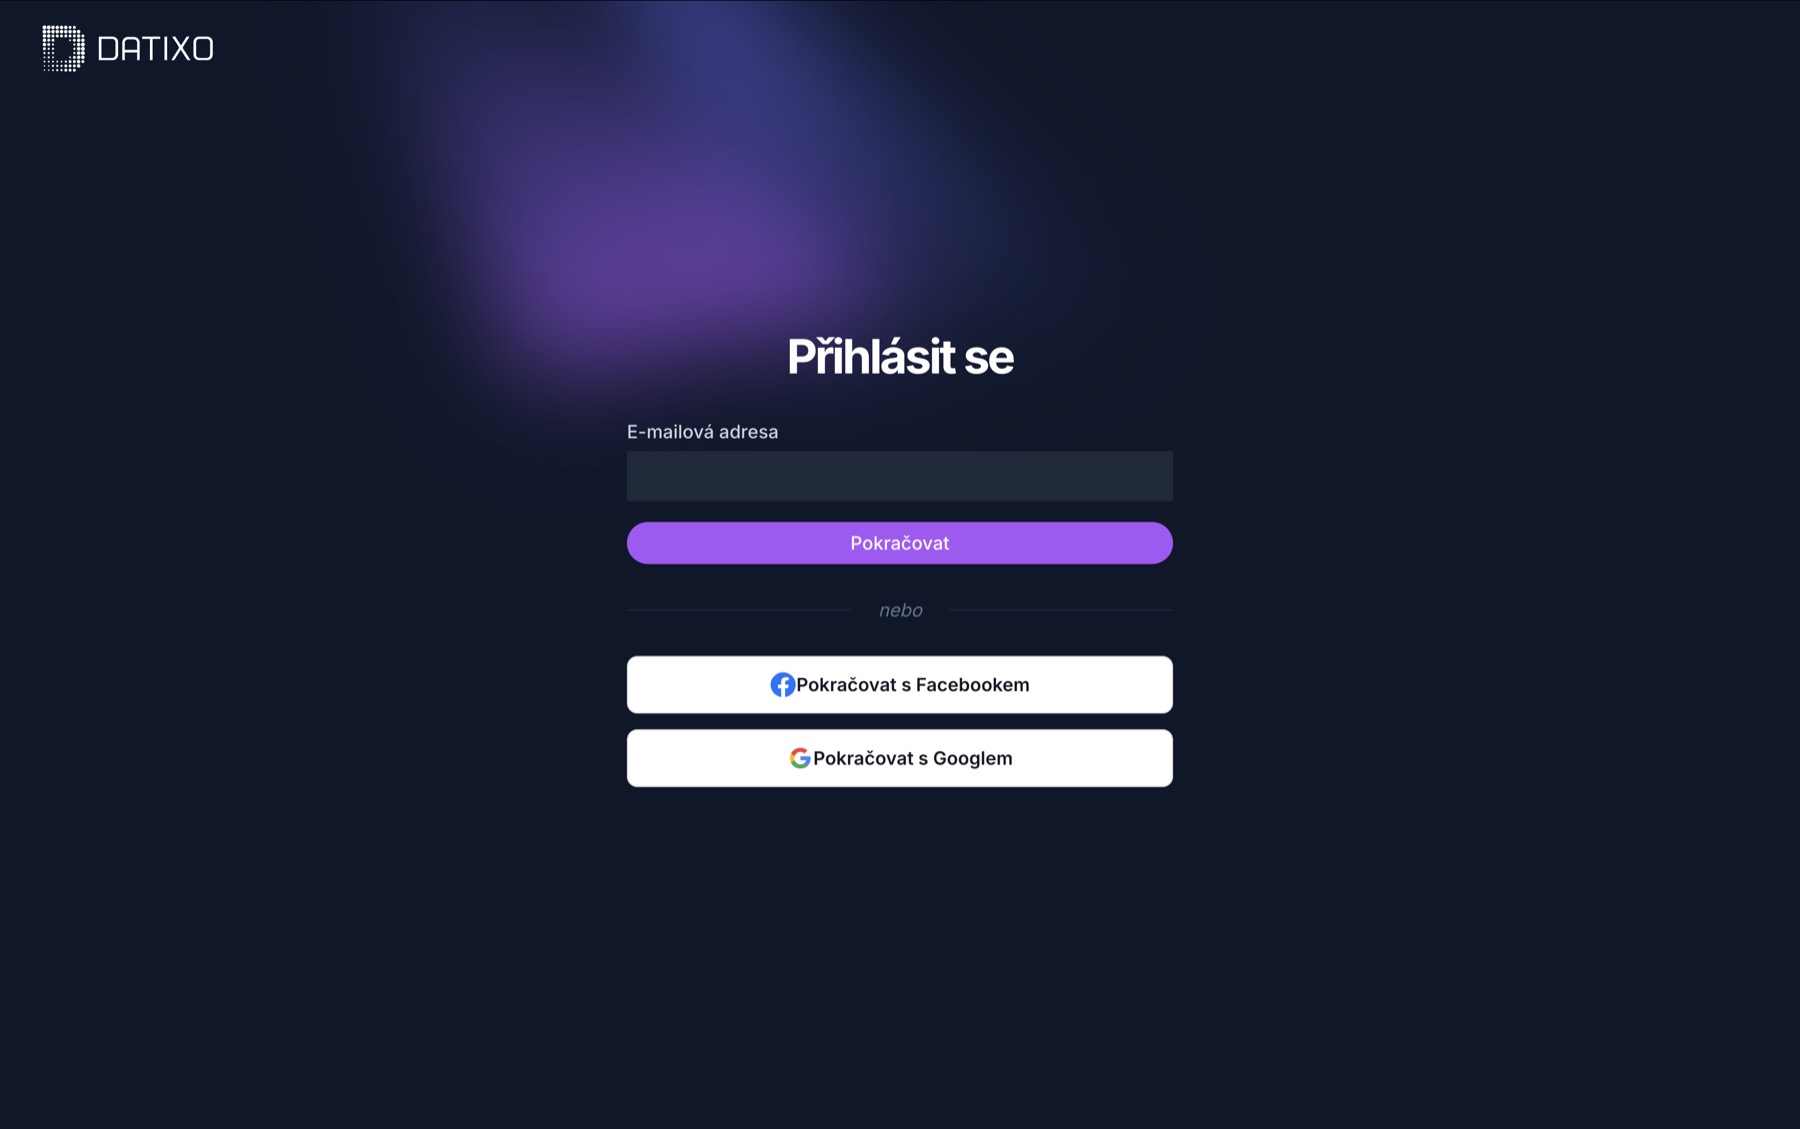
Zadání e-mailu při přihlášení do DATIXO
Based on your email, DATIXO will offer either sign-in or registration.
6

Create an account if you do not have one

This step is only for new users. Enter your name, phone number and password, accept the terms and click Register. If you already have an account, skip registration.
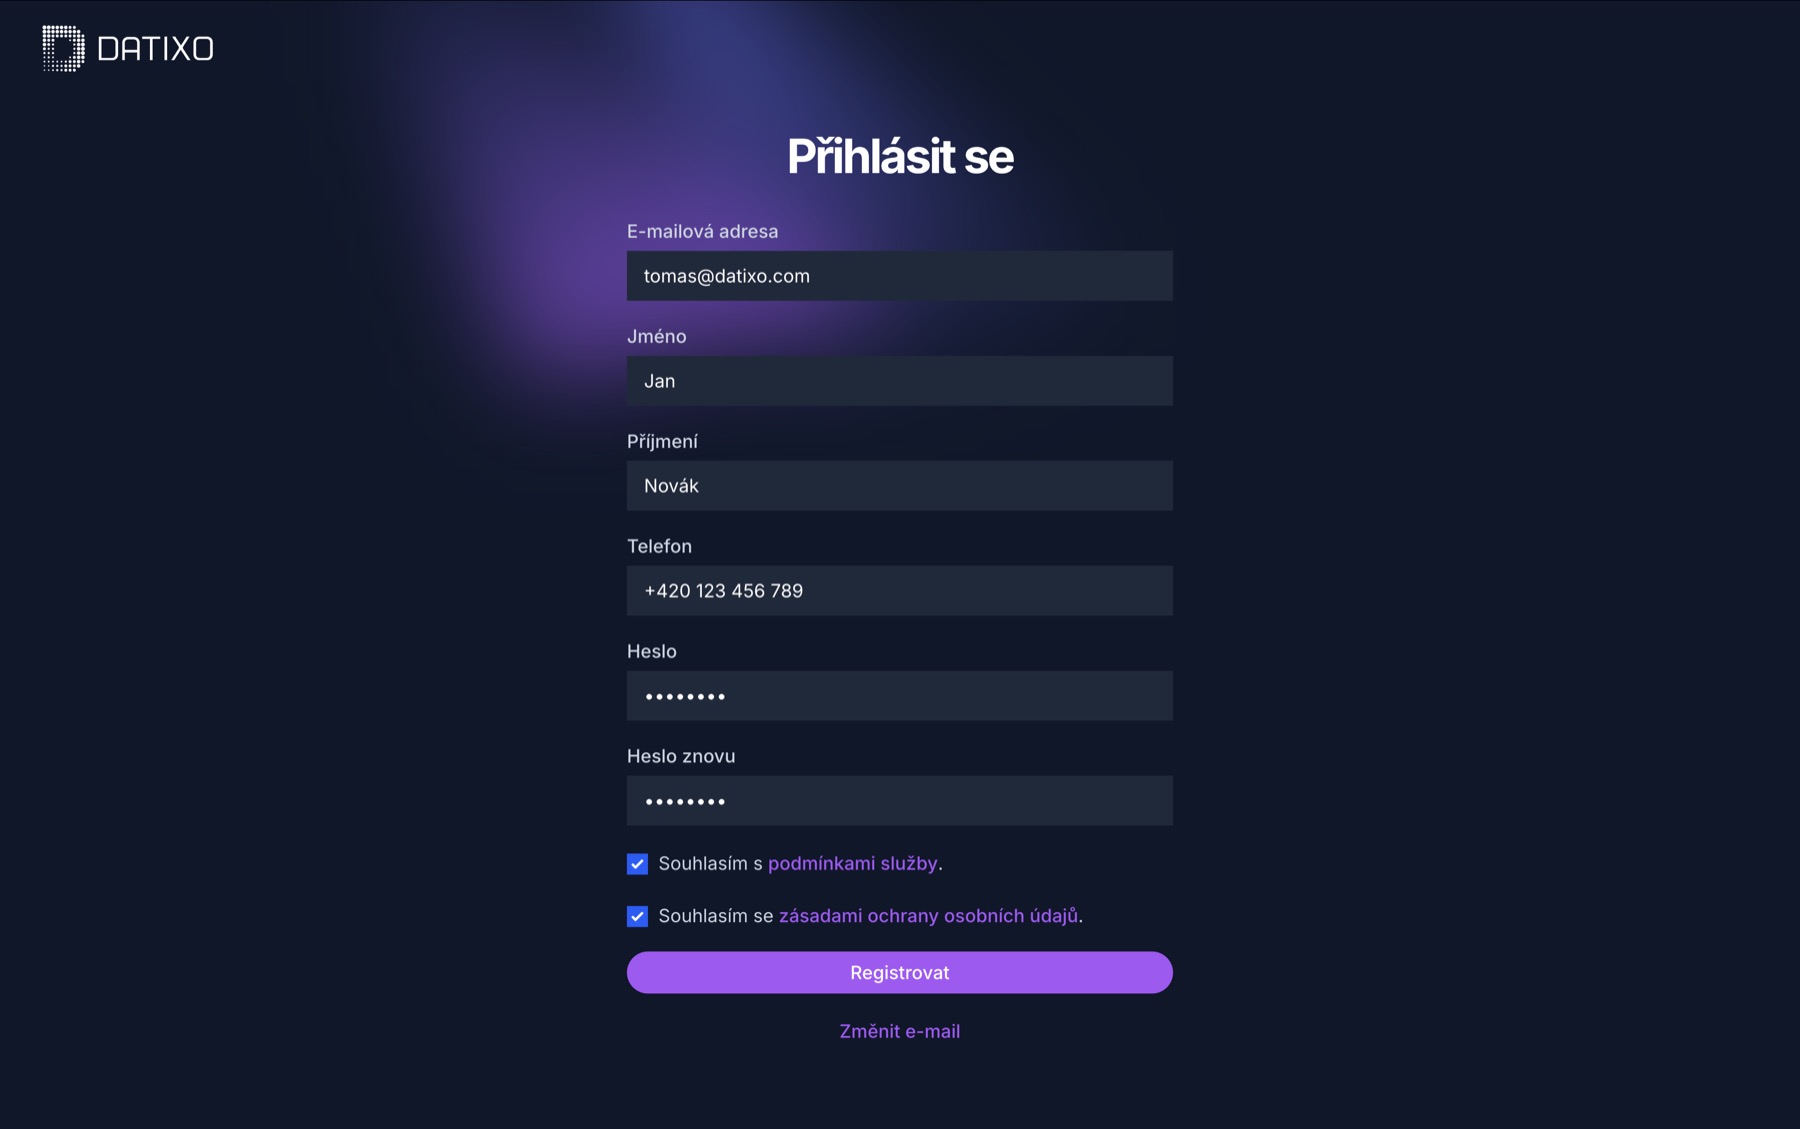
Registrační formulář pro nové uživatele DATIXO
The registration form appears only when creating a new account.
7

Name the project

Enter a name that will make your store easy to identify in DATIXO and click Connect add-on.
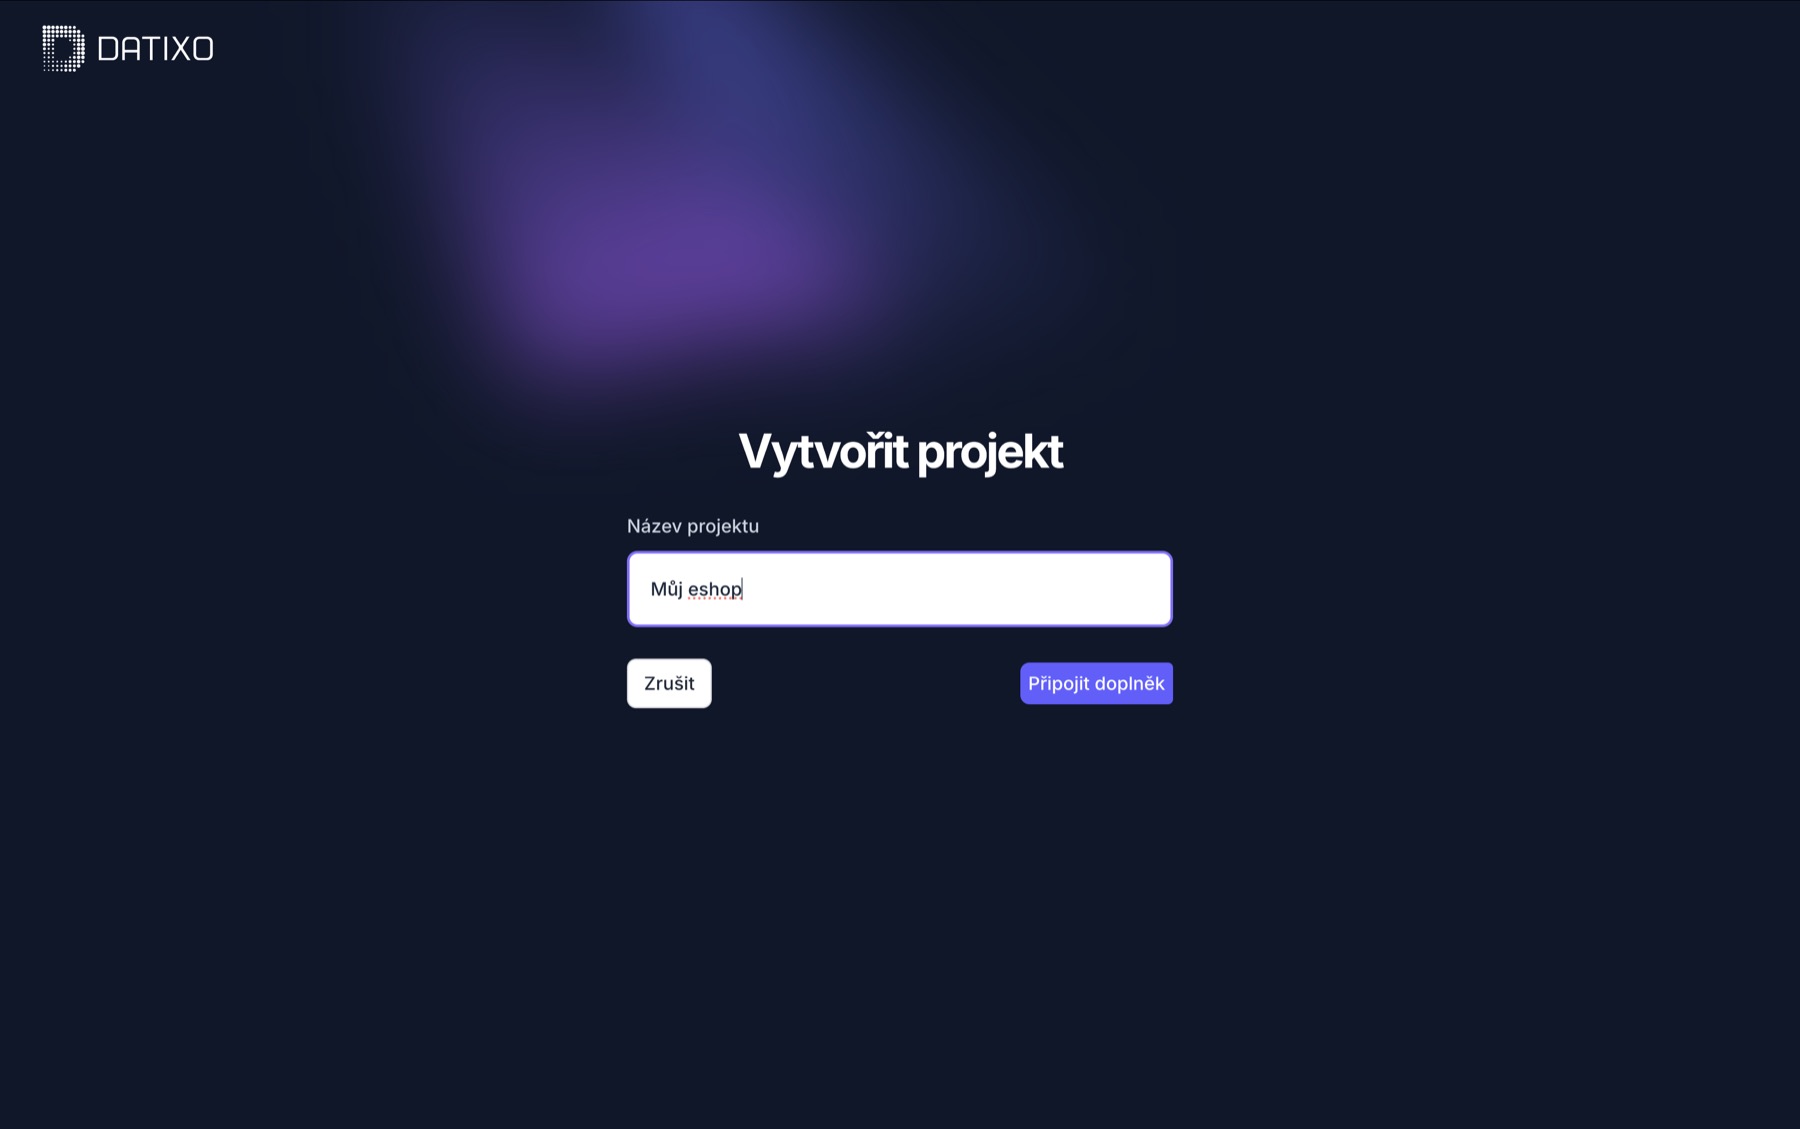
Výběr názvu projektu v DATIXO
The project name helps you identify the store clearly in DATIXO.
8

Choose a subscription

Choose a plan based on your store size and the data history you need. You can switch between monthly and annual billing.
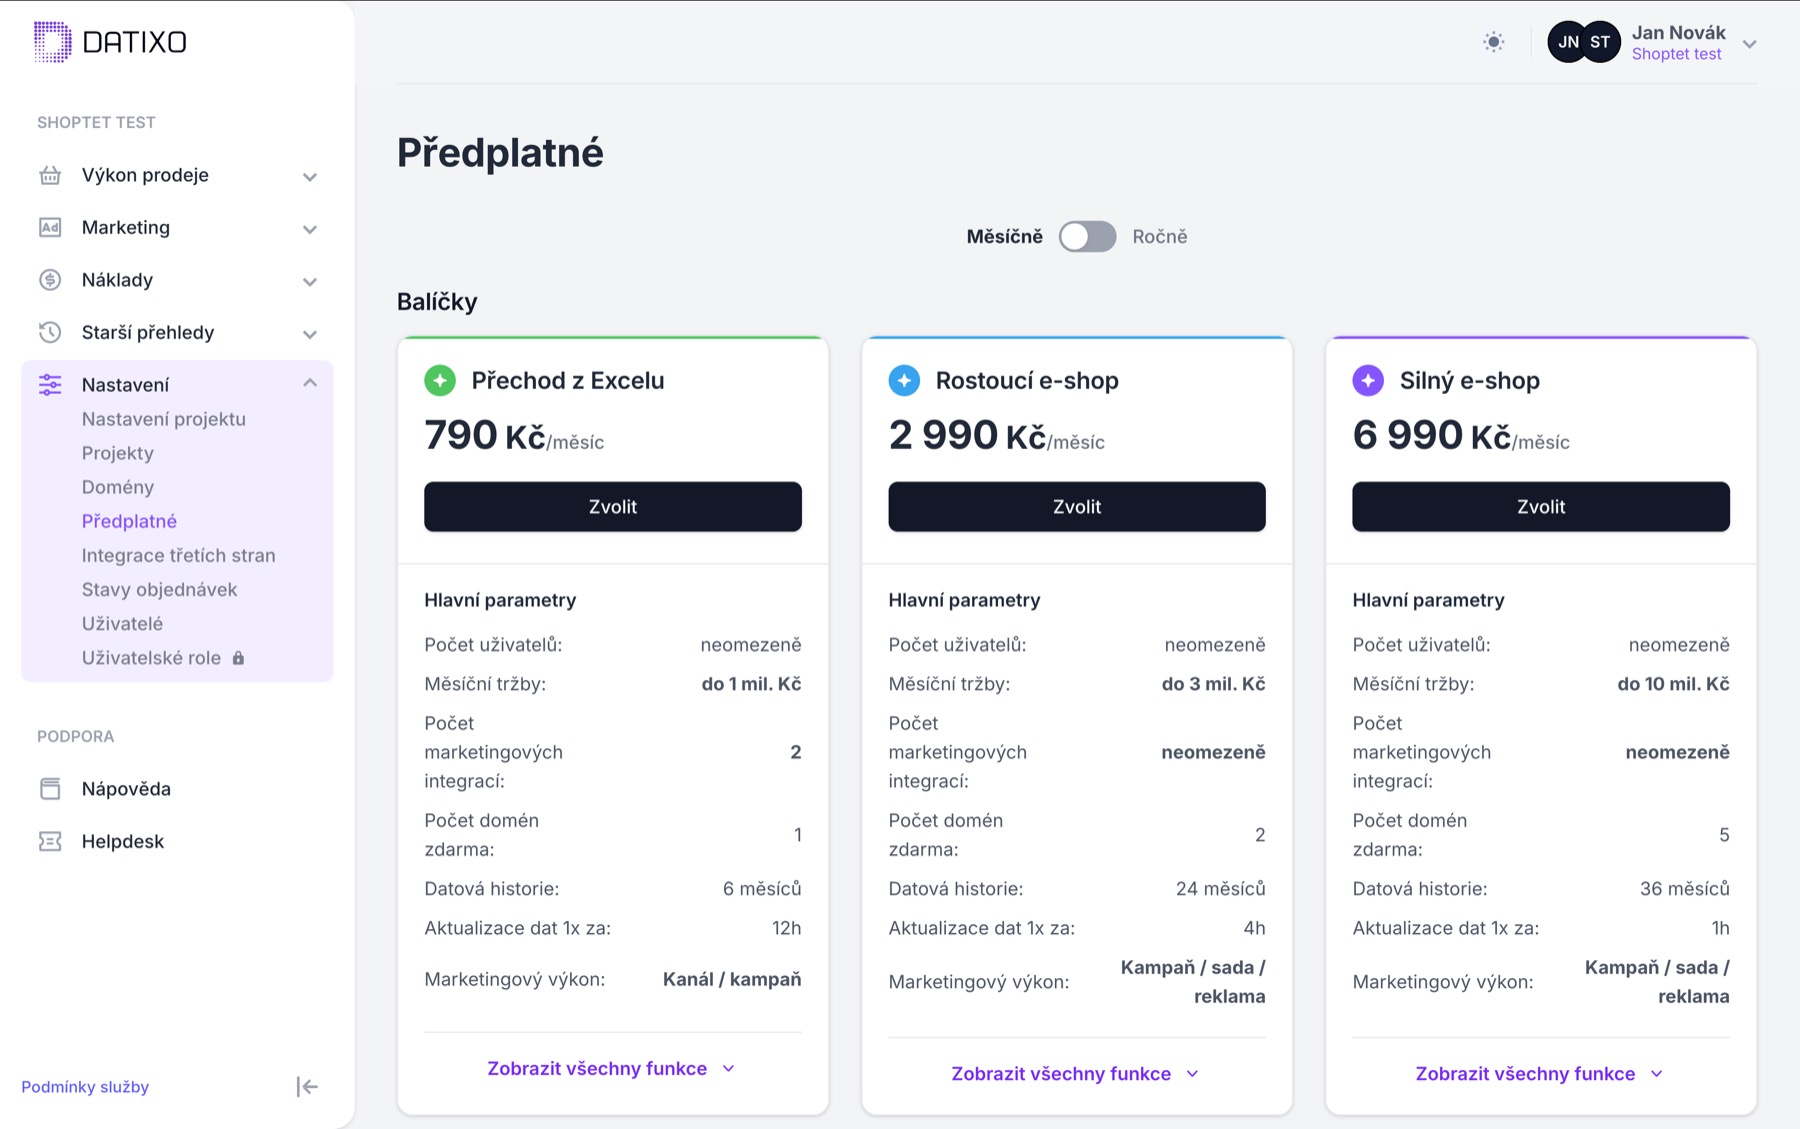
Výběr předplatného v DATIXO
Details of each plan are shown directly below the price.
9

Check the connection

Under Settings → Third-party integrations you will see the Shoptet add-on with the status Active.
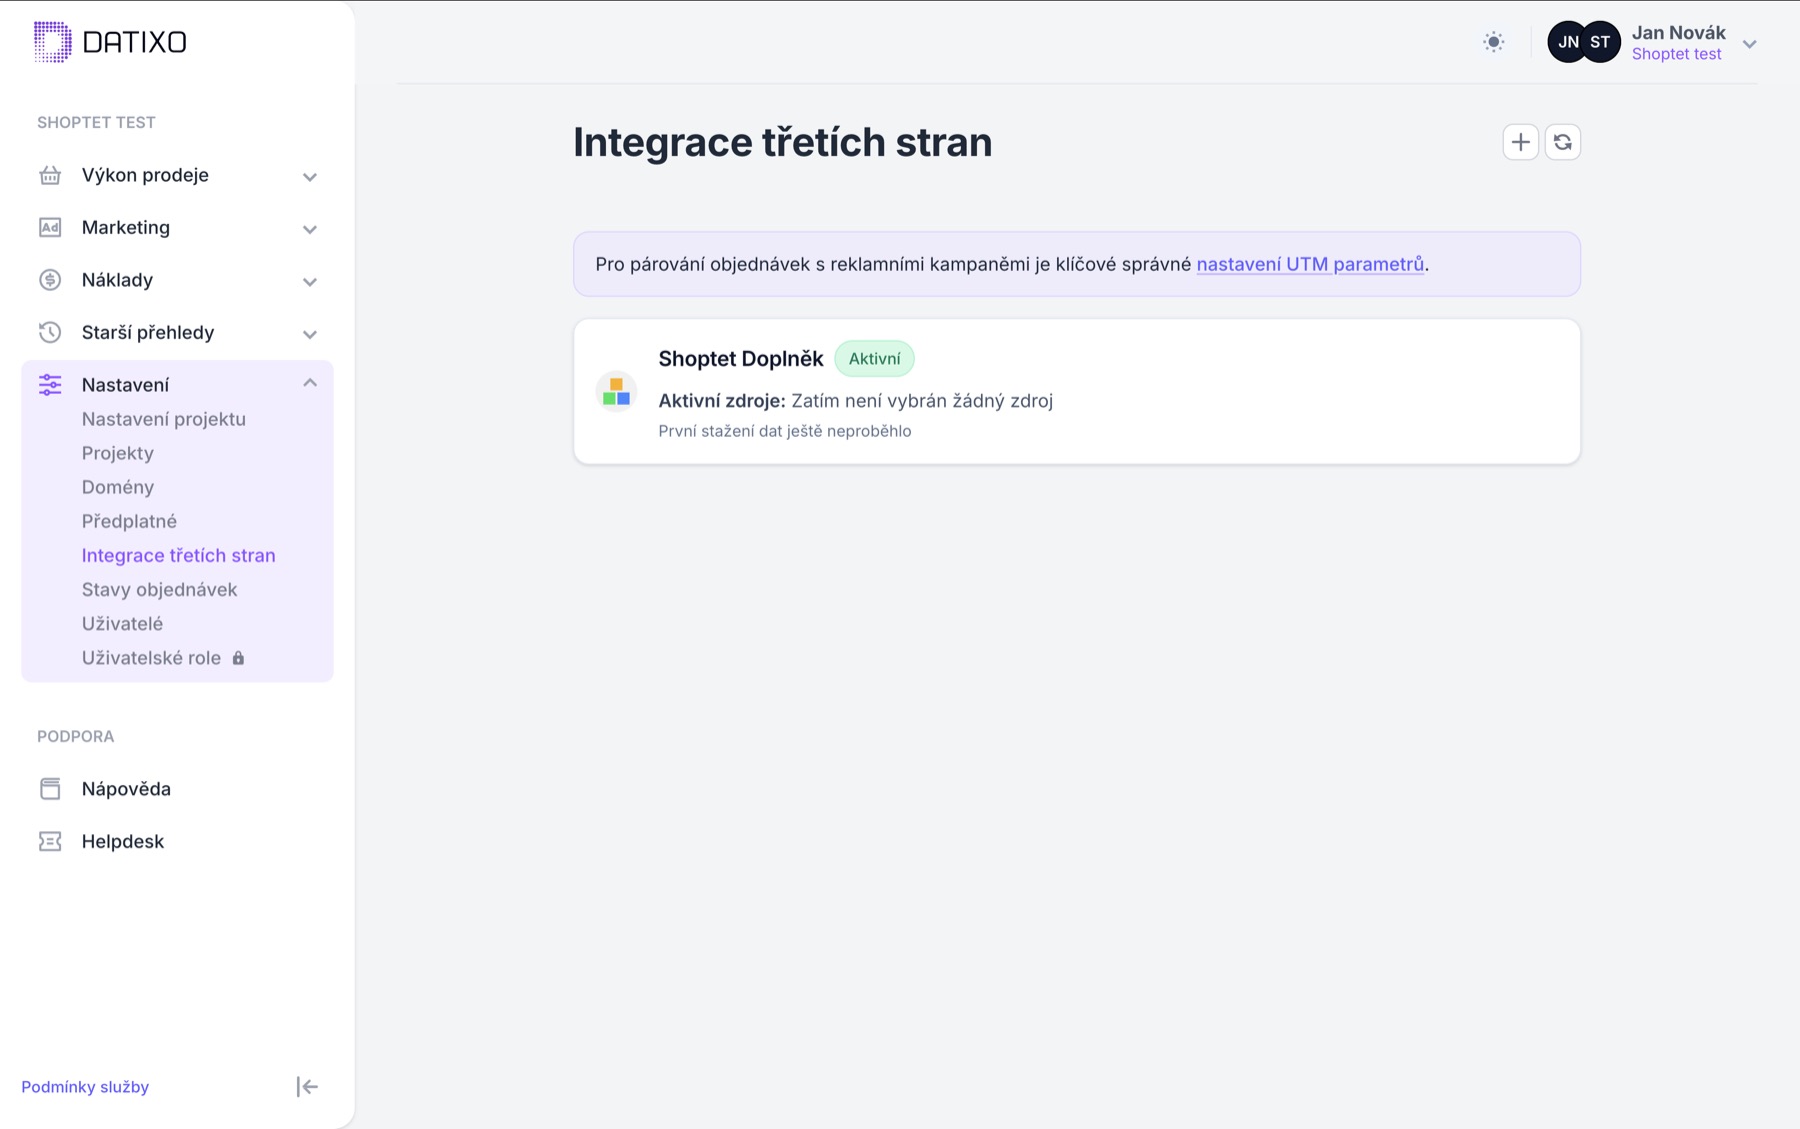
Aktivní propojení Shoptet doplňku v DATIXO
The first order import may take a moment.
10

Connect advertising platforms

Optionally add the advertising platforms you use. DATIXO will then combine orders with marketing costs.
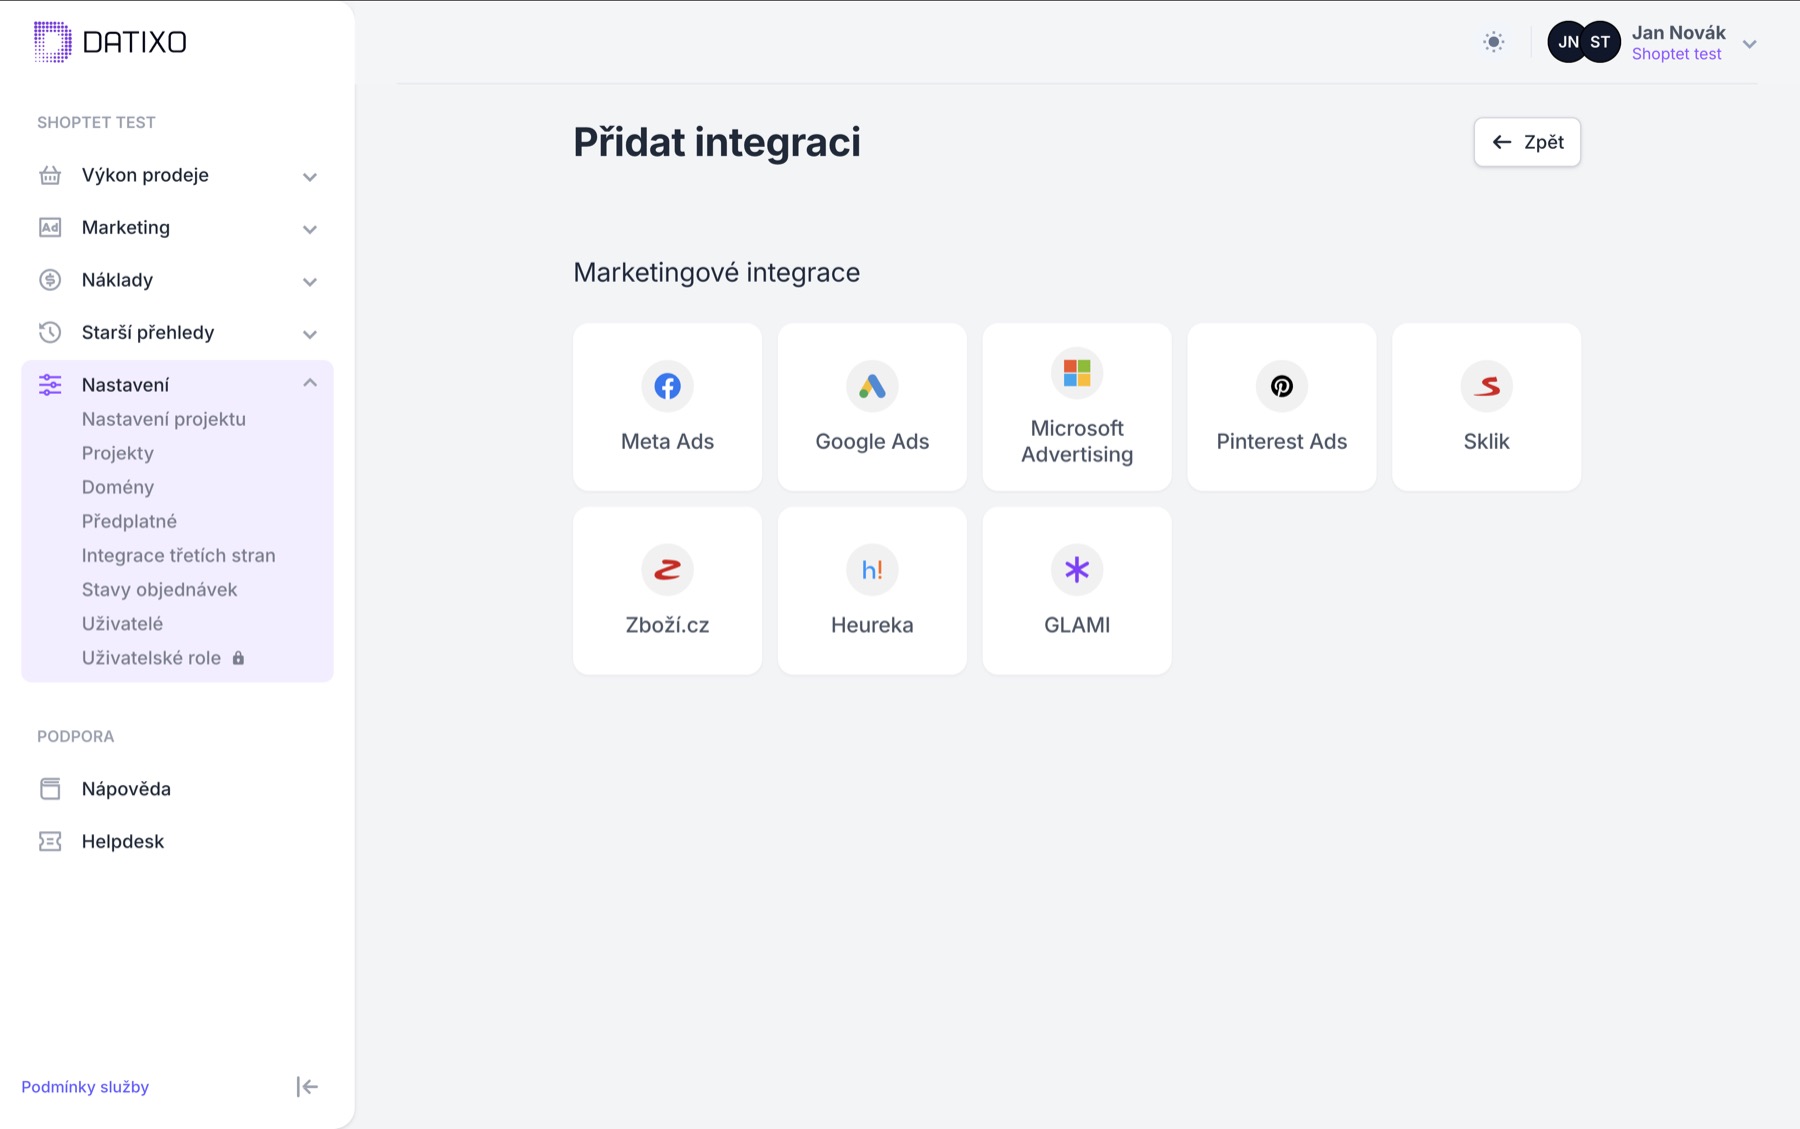
Výběr marketingové integrace v DATIXO
Start with Meta Ads, Google Ads or another platform you use.
11

Done — you can now monitor performance

Once the data loads, your dashboards will show orders, revenue, marketing costs and top-performing products.
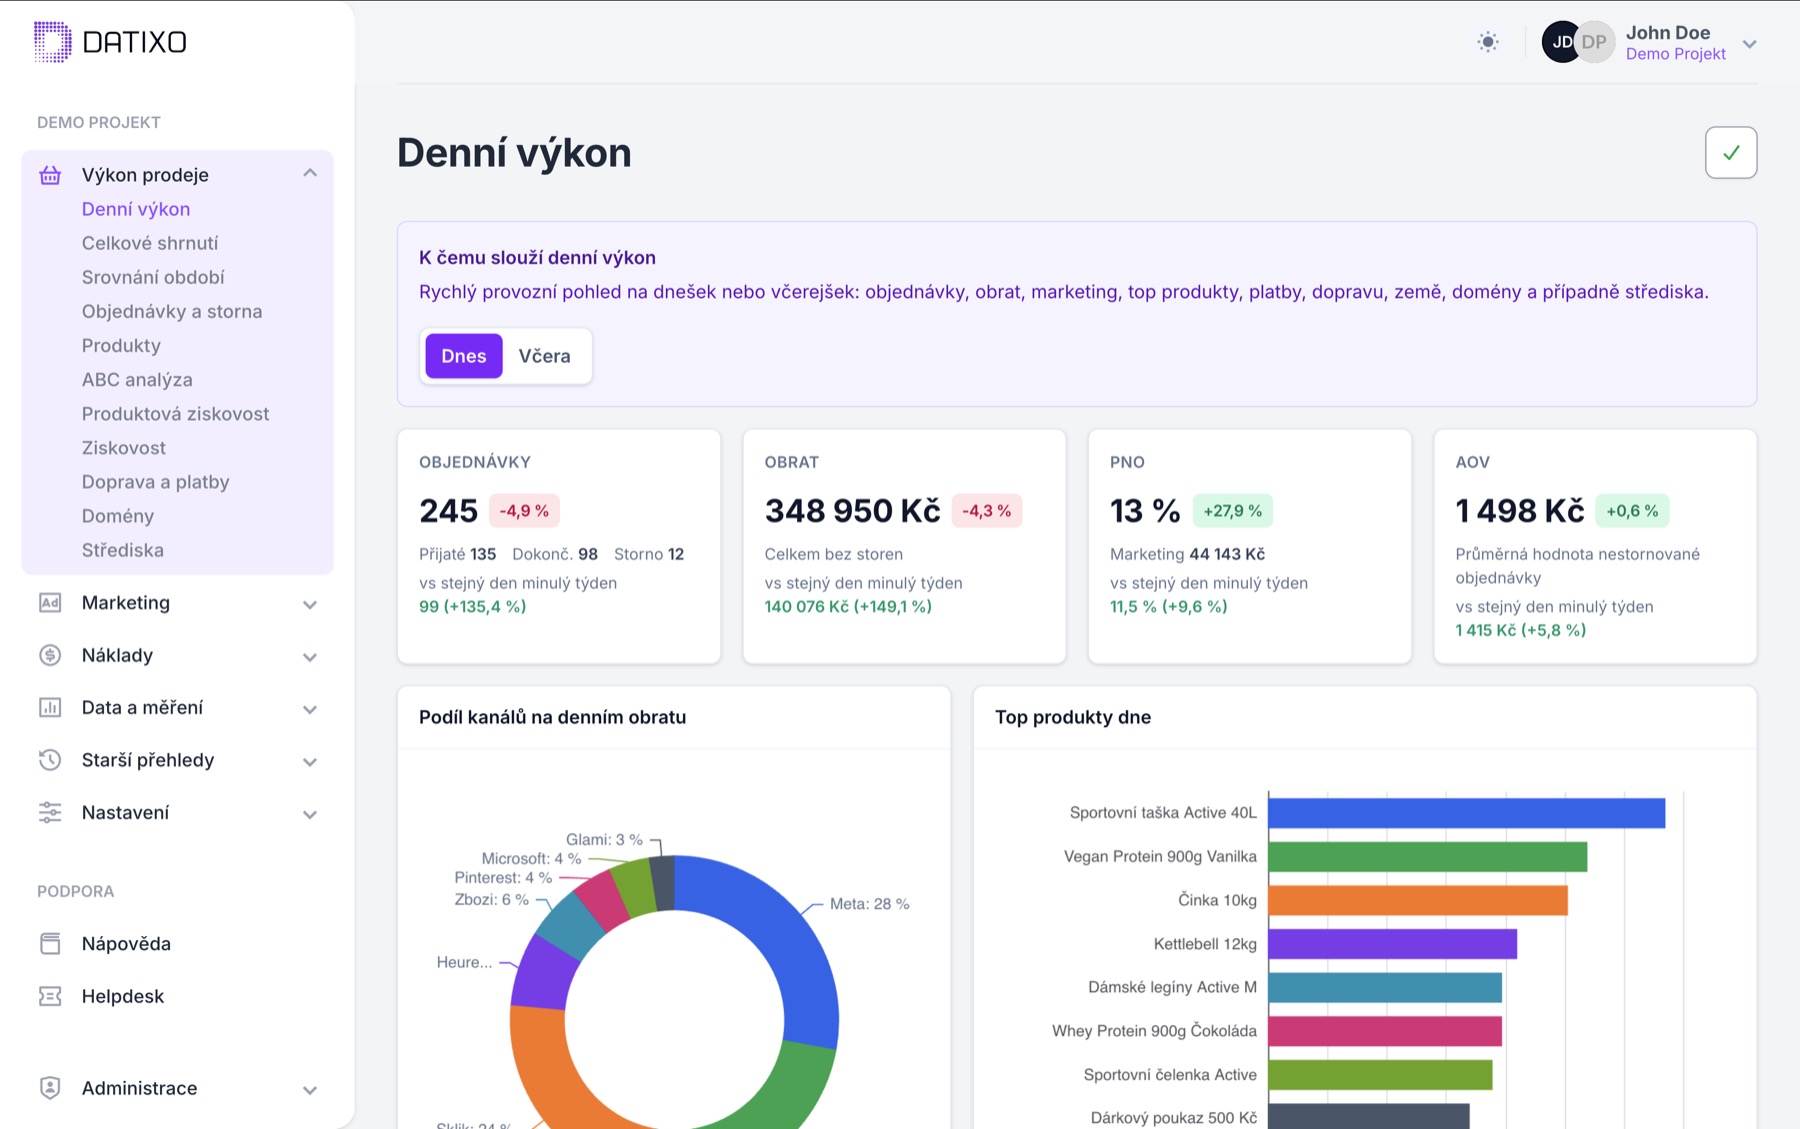
Denní výkon e-shopu v DATIXO
The data will continue to update automatically.
Ready to get started?

Start by connecting your Shoptet store

Open the add-on, select your store and DATIXO will guide you through the remaining setup.

Open the add-on